Last updated November 18, 2026

Free written scope consultation - allowances, timeline, and change-order rules on paper before a single trade is scheduled
Driveway & Pavers Troubleshooting in Pomona: Common Problems and How to Fix Them
If your pavers are sinking in the same spot twice, you don’t have a paver problem. You have a drainage problem wearing a paver costume. That’s the thing most homeowners get wrong about driveway and paver failures: the visible symptom – the dip, the loose sand, the stain – almost never comes from the surface. It comes from what’s underneath, and from how water moves across the property. In Pomona, where wet winters give way to long dry summers, that cycle stresses a driveway in ways a single-season climate never does. This guide walks you through the common problems we see on Pomona driveways and how to tell a cosmetic fix from a base failure that needs real work.
Quick Answer
Most paver problems in Pomona – sinking, cracking, joint sand loss, weed growth – trace back to one of three root causes: a base layer that wasn’t compacted deeply enough, an edge restraint that’s no longer holding, or joint sand washing out under winter rain and dry-summer shrinkage. A cosmetic fix (re-sanding, re-compacting, spot leveling) handles surface-only symptoms, but repeated sinking in the same area usually means the base or drainage has to be opened up and rebuilt before the pavers go back down.
Styles & brands we work with
- Kitchen remodeling
- Bathroom remodeling
- Home additions & ADU
- Roofing
- Windows & doors
- Driveway & pavers
- Fence
Table of Contents
- How to Diagnose a Pavers Failure in Pomona
- Base Layer Failures: The Root Cause Most Homeowners Miss
- Edge Restraint Problems: Why the Perimeter Tells the Story
- Joint Sand Loss and Pomona’s Wet-Winter-Dry-Summer Cycle
- Oil, Rust, and Organic Stains by Paver Material
- Re-Sanding and Re-Compacting vs. Full Re-Installation
- Why Paver Brand and Specification Matter in Pomona
- What Paver Repair and Re-Installation Typically Cost
How to Diagnose a Pavers Failure in Pomona
Before you call anyone or buy a bag of sand, get down on the driveway and look for three specific cues: where the sinking repeats, how the perimeter is behaving, and whether the joints are still full. Those three signals tell you which layer failed.
Here’s the diagnostic sequence we walk homeowners through on a Pomona property:
- Mark the low spots over two rainfalls. If the same dip forms in the same place after each storm, water is pooling and undermining the base in that spot. A one-time dip after a single heavy rain could just be settling.
- Press on the perimeter pavers. If edge pavers rock or wiggle underfoot, the edge restraint has loosened. If they’re solid but the interior pavers move, the problem is likely the sand layer or the base.
- Check joint depth with a screwdriver. If joints are more than about half an inch deep in the traffic lanes but flush at the edges, joint sand has been scrubbed out by tires and rain. That’s a re-sanding job, not a base failure.
- Look for ruts and tire tracks that follow a pattern. Uniform sinking along both tire paths points to insufficient base compaction. Random dips point to a water source underneath.
- Scan for efflorescence (white haze). Efflorescence is mineral salt migrating out of the concrete. It’s cosmetic but signals moisture is moving through the pavers more than it should.
- Check the slope toward the street and the house. Driveway pavers should drain away from the foundation and toward the street at a consistent grade. If water ponds mid-driveway or runs toward the garage door, the drainage is wrong and no amount of re-sanding will fix it.
If any three of those signals line up, you’re looking at a base problem, and a small test pit is what confirms it. A single section lifted out of the driveway can tell a trained eye whether the aggregate base is at the right depth and compaction.
Base Layer Failures: The Root Cause Most Homeowners Miss
Pavers are the visible part of a stack that starts below grade. Underneath every paver you should have (from the bottom up) compacted native soil, a compacted aggregate base at proper depth, a one-inch bedding course of concrete sand, the pavers, and joint sand. When any layer in that stack fails, the pavers above telegraph the failure – and no surface fix lasts.
How to tell a base failure from a surface problem
The clearest signals of a base failure:
- Sinking that returns in the same location within weeks or months of a fix
- Pavers that rock or shift when stepped on, or that form a shallow bowl across several rows
- A visible line where one section sits lower than the adjacent section
- Water that pools on the driveway and stays for hours after rain
- Joints that open up in a wide band, then refill during heavy rain, then open again
The clearest signals of a surface-only problem:
- Joints low but pavers solid and flat
- Isolated moss or weed growth in a joint
- A single chip, crack, or stain on one or two pavers
- Loose sand near the garage floor or street apron
In Pomona, base failures show up most often on driveways that were installed with a base depth sized for a lighter load, or where the soil was never properly compacted before the base went down. Our clay-heavy soil here holds water in the wet months and then shrinks in the dry season, so a base built over uncompacted clay will move seasonally no matter how good the pavers are.
How a proper base repair works
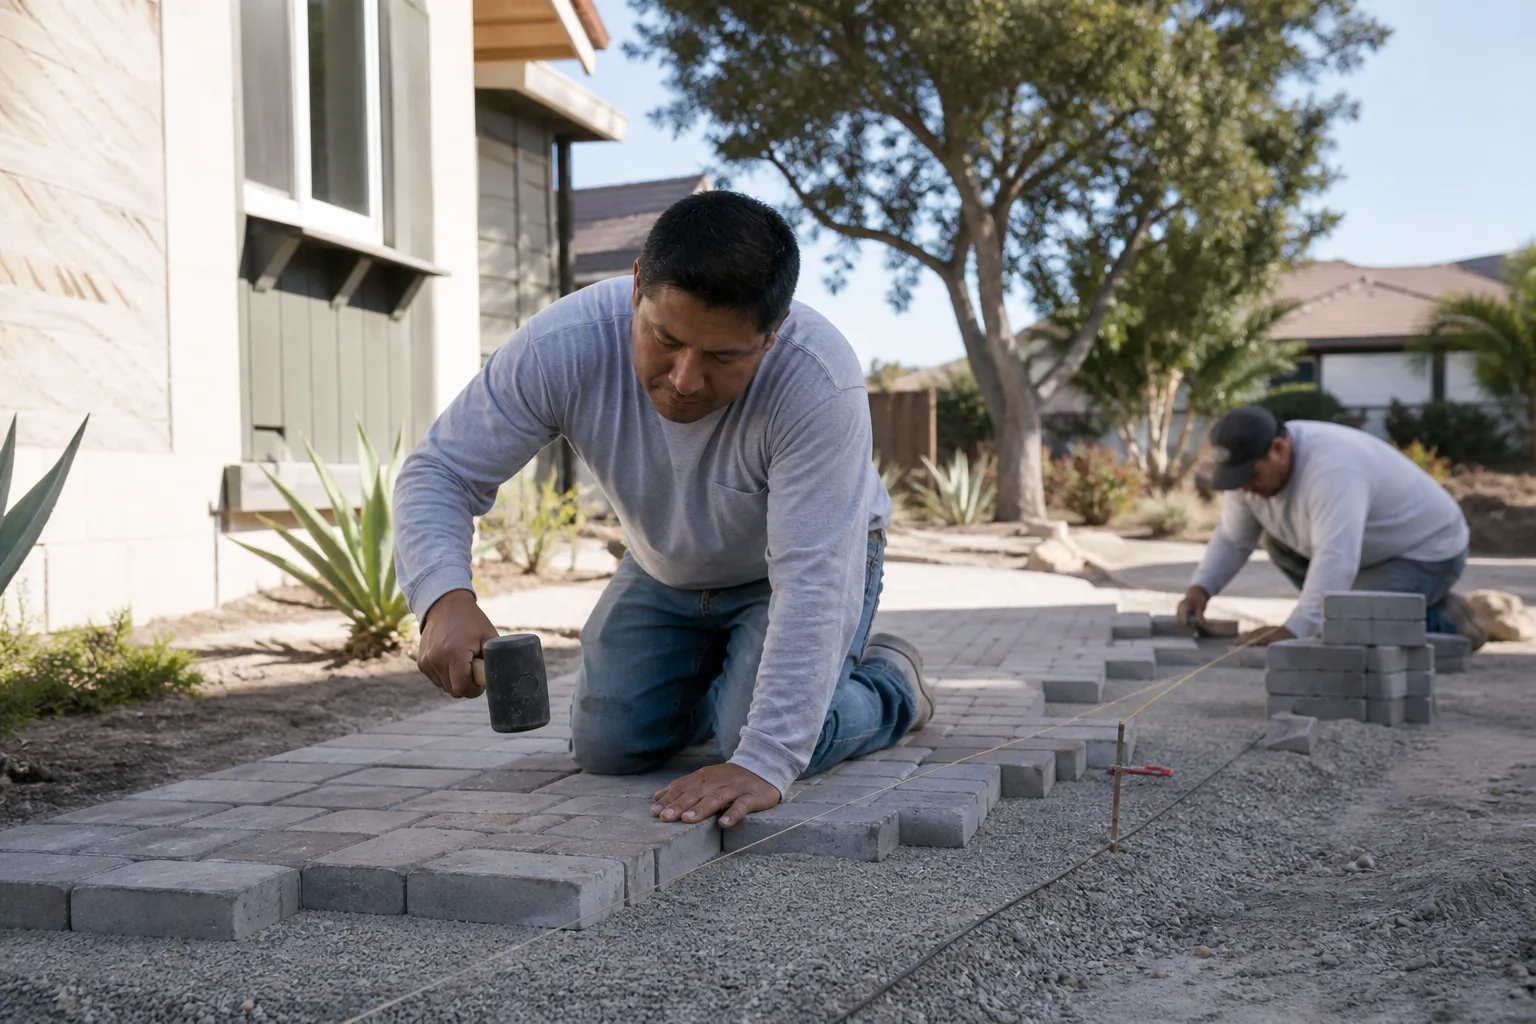
A proper repair means cutting out the failed section – usually a larger footprint than the visible dip – excavating to the depth where aggregate is still compacted and sound, then rebuilding the base in lifts, water-setting and compacting each lift, re-laying the bedding course, resetting the pavers, and re-sanding. Compacting the base in one thick pass doesn’t work; the bottom stays loose and the surface reverts. This is the single step that separates a repair that lasts from a repair that doesn’t.
If the base repair covers most of the driveway, re-installation of the whole field is often the honest call – the seam between old and new will always be the weak point. That’s a conversation we have with homeowners before any work starts, and it’s the reason we walk the whole driveway & pavers layout and check the drainage plan first.
Edge Restraint Problems: Why the Perimeter Tells the Story
An edge restraint is the aluminum, plastic, or concrete curbing that locks the outer pavers in place. It’s the least visible part of the installation and the most underrated. When edge restraint fails, the outer row of pavers spreads outward over time, joints open up through the field, and joint sand washes into the void behind the failing restraint. The whole driveway slowly loosens from the edges in.
How to check your edge restraint
- Walk the perimeter along the street apron, the garage apron, and any planter or landscape edge.
- Press each edge paver with your foot and watch for movement.
- Look for a gap between the edge paver and the soil or concrete border beyond it.
- Examine joint width through the first three rows. If joints are wider near the edge than they are in the middle, spreading has already begun.
Edge restraint that has loosened usually has to be reset with new spikes into a compacted base, sometimes with the last row of pavers lifted and re-bedded. Just hammering the old restraint back in won’t hold. On driveways in Pomona that slope toward the street, a failing edge restraint at the street apron is where we find it first.
Joint Sand Loss and Pomona’s Wet-Winter-Dry-Summer Cycle
Pomona’s wet winters followed by dry summers put a specific strain on joint sand. Rain saturates the joints, softens the sand, and starts moving it out along with tires rolling over wet pavers. Then dry summer heat shrinks the sand and opens up voids. Repeat that cycle and you get what looks like settling – but the pavers are actually fine. The joints are just empty.
The three types of joint sand and where each fits
- Regular washed sand. Least expensive. Washed into joints and left to settle. It works on low-traffic paths but gets scrubbed out of a driveway quickly.
- Polymeric sand (also called jointing sand). Sand mixed with a polymer that cures when wet. It holds up better against rain and traffic than plain sand, but it needs to be installed dry, must be activated correctly, and has a service life – expect it to need refreshing on a high-traffic driveway before a low-traffic path does.
- Polymeric sand with a stabilizer additive. The next tier up on joint stability for a Pomona driveway. It’s the option we typically recommend for main driveways rather than side paths.
Re-sanding is only worth doing if the joints are still at the right depth and the pavers are stable. If pavers are rocking, re-sanding alone is a wasted bag of sand. If joints are being emptied faster than a driveway should be capable of, there’s usually a drainage problem behind it – water running a channel across the surface – which is a base and grading conversation, not a sand conversation.
One more Pomona-specific point: polymeric sand has a shelf life and contains moisture-sensitive chemistry. Bags that have been sitting in a hot garage through a Pomona summer may not activate properly. Fresh product, applied at the right moisture level, is what gets the warranty results.
Oil, Rust, and Organic Stains by Paver Material
Stain removal on pavers is not a single method. What works on concrete pavers can etch natural stone or travertine badly, and it’s a common DIY regret. The right product depends on the paver material AND the stain type.
Stain removal by paver material
- Concrete pavers (including Belgard, Techo-Bloc, Cambridge Pavers, Unilock, and Tremron). These are typically the most forgiving. A degreaser for oil, oxalic acid for rust, and a mild bleach solution for organic stains and algae generally won’t harm the surface if you test a small spot first and rinse thoroughly. Avoid aggressive acid washes that can dull the color.
- Clay brick pavers. Similar to concrete for oil and organic stains, but avoid high-pressure washing that strips the surface layer. Rust responds well to oxalic acid, but rinse fast and don’t let it sit.
- Natural stone (travertine, limestone, bluestone). These are where DIYers do real damage. Travertine is calcium-based and acid will etch it – oxalic acid, vinegar, and most commercial rust removers will leave a permanent dull mark. Use pH-neutral stone cleaner for everyday stains, and call for anything involving rust, mortar haze, or deep oil.
- Permeable pavers. Standard degreasers can clog the surface voids that make them permeable. Use permeable-rated cleaners.
Quick reference by stain
- Oil. Absorb fresh oil immediately with kitty litter or cornmeal, sweep up, then use a paver-safe degreaser. Old, soaked-in oil may need a poultice on stone or a series of degreaser applications on concrete.
- Rust. Oxalic acid works on concrete and clay; never on travertine or limestone. Stone rust usually needs a poultice and patience.
- Efflorescence. White salt haze. A dilute vinegar-and-water wash on concrete pavers, followed by a dry brush. Don’t seal over efflorescence – the salt will push through the sealer.
- Organic stains (leaves, algae, moss). A dilute bleach solution on concrete, a biocide on stone. Sweep leaves before they sit through a wet spell.
If you’re unsure what material your pavers are, bring a sample to your installer or check with the manufacturer – Belgard, Techo-Bloc, Cambridge, Unilock, and Tremron all publish care guides specific to their products.
Re-Sanding and Re-Compacting vs. Full Re-Installation
This is the question we get most often on Pomona driveways, and it’s the one where an honest answer saves a homeowner real money. Re-sanding will fix a real problem – or it will waste your time and money – depending on what the underlying failure is.
Re-sanding is the honest answer when:
- The pavers are flat and stable; the joints are just low
- The failure is isolated to joints along the traffic lanes
- Edge restraint is still solid and there’s no perimeter spreading
- The base has no soft spots when you drive over it slowly
Re-compacting (with fresh joint sand and base touch-up) is the honest answer when:
- There’s a mild dip or two with joints opening up, but no deep rutting
- The pavers still interlock well enough to accept compaction
- The base hasn’t failed – the surface just needs to be brought back to grade
Full re-installation is the honest answer when:
- Sinking has returned in the same spot after a previous fix
- Water pools on the surface or runs toward the house
- The base is soft underfoot or visibly failed across multiple sections
- Edge restraint has spread more than one row of pavers
- Pavers have cracked across a wide band rather than one isolated paver
A cheap re-sanding on a failed base is the classic repeat job. You’ll be back to the same place in one to two winters. And sometimes the real solution isn’t paver work at all – it’s grading, a drain, or redirecting downspouts and A/C condensate so water stops pooling on the driveway in the first place. On homes where a renovation is planned nearby, this is the moment to check how the new work will affect drainage and the shared edge with the property line – the crew doing a fence installation will be digging along that same edge and the two projects should coordinate.
Why Paver Brand and Specification Matter in Pomona
Not all pavers are created equal, and the wrong spec on a Pomona driveway means faster failures even with a perfect install. Premium paver lines publish engineering specs – compressive strength, water absorption, freeze rating (irrelevant here, but a proxy for density), and warranty terms – which is what you want to compare against actual traffic and climate.
The brands we install
We source pavers from Belgard, Techo-Bloc, Cambridge Pavers, Unilock, and Tremron – brands with published specs and installed-warranty programs that the installer is required to activate correctly. Each has different strengths: some lines are engineered for high traffic, others lean toward design options and color, and some offer better value on large driveway footprints. The point isn’t that one brand is best across the board – it’s that a driveway should be specified by traffic, drainage, and color, not by whatever’s stacked at the front of the yard.
The same principle applies to edge restraint and the accessories around a driveway. We install edge and accent products from fencing and hardscape lines like Barrette and Master Halco where a driveway meets a fence, so the transition is planned rather than improvised. It’s the same approach we take from the driveway to the roofline: name-brand materials, professional installation, and one contractor managing the sequence.
If you’re considering a broader exterior project alongside driveway work – fencing, a gate, or planning an home additions & ADU that will change how cars park and turn around – it’s worth bringing the paver spec into that plan rather than patching it later. A new ADU or garage usually changes the traffic pattern on the existing driveway, and the base has to be sized for the new load.
What Paver Repair and Re-Installation Typically Cost
Paver work in Pomona comes in three broad tiers, and the honest range depends on which tier you actually need. These are typical estimates for the local market – your written, itemized estimate sets the final price, and we walk the driveway before quoting so there are no surprise change orders.
Typical repair categories
- Re-sanding only. Cosmetic fix for joint sand loss with stable pavers. Lowest tier of paver work.
- Re-sanding plus targeted base repair. Lifting a defined section, rebuilding the base, resetting pavers, re-sanding. Mid tier.
- Full re-installation of the driveway field. Removal, base rebuild, re-purchase of pavers if the originals can’t be recovered, re-sanding. Highest tier.
What moves the number
- Square footage of the affected area
- Whether replacement pavers match the original color and line (discontinued lines cost more)
- Whether drainage correction is needed (grade change, added drain, downspout rerouting)
- Whether the edge restraint has to be rebuilt
- Whether the original pavers can be lifted and reused (or have to be replaced)
The single most reliable way to get a real number is a free estimate. Repairs that require opening the base start with a small test pit – one section lifted out to see the base depth and condition – and the itemized quote prices the job from what’s actually there. Call (844) 320-5194 to schedule a free estimate, ask for a written line-item quote, and get the paver spec confirmed before any material is ordered. Estimates are free, and the estimate sets the price with no change orders once work starts. We answer 24/7. Fast dispatch from 7am to 7pm, Sunday through Friday.
Common Mistakes to Avoid
- Re-sanding over a failed base. New sand in a failed joint looks good for a few weeks, then washes out again. It’s the most expensive way to delay the real repair.
- Hammering loose edge restraint back in. A restraint that has pulled out of a failed base won’t hold with new spikes. Reset the base beneath it or it’ll loosen again inside a season.
- Pressure-washing travertine or limestone. High pressure and acidic cleaners etch calcium-based stone permanently. Use pH-neutral stone cleaner and a low-pressure rinse.
- Ignoring water direction. Pomona’s wet winters will find any low spot. Before any paver work, confirm surface slope runs away from the house and toward the street. If it doesn’t, fix that first.
- Buying pavers by the pallet without matching the original line. A “close” match in color or texture stands out on a driveway in direct sun. Pull the original spec from the installer or the manufacturer’s records before ordering.
- Sealing over wet pavers or over efflorescence. Sealer traps moisture and salt and makes both worse. Pavers need to be fully dry and the efflorescence stabilized before any sealer goes down.
- Assuming a hairline crack means the whole driveway needs replacement. Most single-paver cracks are a chipped paver – one board replaced, not the whole field.
See the difference
 Before
 After
 Before
 After
 Before
 After
When to Call a Professional
Call a professional if sinking has returned in the same spot after a previous fix, if water pools on your driveway or runs toward the garage door, if pavers rock underfoot across more than a couple of rows, if edge restraint has spread, or if you can’t identify what material your pavers are and you want to try a stain treatment. Any of those means the base, drainage, or restraint needs to be opened up – which is not a DIY-safe job on a load-bearing surface. A base repair means lifting pavers, cutting into compacted aggregate, and re-compacting to spec, and getting it wrong means repeating the work. Construction Pomona offers free estimates in Pomona – call (844) 320-5194. We answer 24/7. Fast dispatch from 7am to 7pm, Sunday through Friday. The estimate is itemized, and the written estimate sets the price.
Frequently Asked Questions
Pavers sink in the same spot because the base beneath that area was never properly compacted or is being undermined by water. A surface patch (new sand, re-compaction of the top inch) fixes the symptom for a few weeks, then reverts because the underlying base is still loose or wet. The honest fix is to cut out the failed section, rebuild the base in compacted lifts, and reset the pavers. Call (844) 320-5194 for a free estimate on a base repair – estimates are free.
Re-sanding a stable driveway is one of the more homeowner-friendly paver tasks – but only if the pavers are flat and the base is sound. If the pavers rock, if joints are opening after re-sanding, or if water is pooling, re-sanding alone is a waste of money. A free estimate will tell you which category you’re in before you buy sand. Call (844) 320-5194 to schedule one.
Rust on travertine should not be treated with oxalic acid or any acid-based rust remover – travertine is calcium-based and will etch permanently. Use a pH-neutral stone cleaner for surface rust, and bring in a stone specialist for deep stains. A poultice method applied correctly is the only reliable approach for rust that has soaked in. Call (844) 320-5194 for a free estimate on stone care before trying a DIY acid wash.
A re-sanding or re-compaction job on a typical driveway is a short-duration project, while a targeted base repair takes longer because the aggregate has to be dug out, built back in lifted layers, and compacted. Full re-installation of a driveway takes the longest. The estimate walks the driveway and gives you a realistic timeline for your specific job. Call (844) 320-5194 for a free estimate – we’ll walk the driveway and tell you which tier of repair is realistic.
No – the written, itemized estimate sets the price, and we don’t add change orders for work that was priced on the estimate. What can change the scope is what the crew finds when the base is opened up (for example, a hidden drainage issue) – that’s discussed with you before any additional work is scheduled, not added to the bill. Call (844) 320-5194 to schedule a free estimate.
Paver installation and repair on an existing driveway generally may not require a permit, but any change to the driveway’s footprint, grading, or drainage toward the street can. Ask the City of Pomona’s building department directly before any work starts, and if a project also touches fencing at the property line, verify the fence height and setback rules at the same time. We route all permitting questions through the customer’s local jurisdiction. Call (844) 320-5194 for a free estimate on the paver work itself.
The Bottom Line
Pavers are a very forgiving surface to live with – when the base underneath them is built right. In Pomona, the pattern to remember is that wet winters and long dry summers stress the joint sand, and any water that pools on the surface eventually finds its way into the base. Diagnose before you patch. Look at where the sinking repeats, whether the perimeter is moving, and whether joint sand is genuinely low or genuinely being scrubbed out. If two or more of those signals line up, the honest repair is a base rebuild, not another bag of sand. If you’re ready to get a real number, start with a free estimate on the Construction Pomona team – we walk the driveway, check the base, and price the job from what’s actually there.
Call (844) 320-5194 to schedule your free estimate. We answer 24/7. Fast dispatch from 7am to 7pm, Sunday through Friday. Name-brand materials, professional installation, and a written itemized estimate that sets the price – from the driveway to the roofline, one contractor for every phase.
Written by the team at Construction Pomona.